Book Creator – What’s New?

book creator

Book Creator is a quality app that is simple to use (the Year 1/2 class would have no trouble getting the hang of it). It is the most versatile literacy based app we have on the iPads – it is a great way for students to present their learning.

The latest update to Book Creator provides a significant addition to this great app, the ability to create comic books. The thing I have always liked about Book Creator is its simplicity while still producing a great product. The comic book addition continues these qualities making it easy for your students to produce their own.

Step 1: Select a format

IMG_0032Step 2: Add the number of panels you would like. There is a wide selection of panel formats.

IMG_0033

Step 3: Then select your photos or own drawings, stickers, text, speech bubbles and shapes. You can also select from a range of comic book style backgrounds. I didn’t have time to put together a traditional comic so I put in some photos from our family trip to New Zealand.

IMG_0038 IMG_0037

Once the students have finished their comics (or regular book) there are a number of ways to share the completed product:

1. Using the share button in the app students can put their book into the iBooks app on the iPad. Select the share button in the app and choose Export as ePub then Open in then iBooks. The comic can then be read similar to a traditional book by turning pages. Any audio and video will be able to be listened to and viewed in this format. This does not remove the comic book from the iPad.

2. If you want to remove the comic from the iPad there are 4 options.

  • Using the share button in the app select Export as Video then Save Video (or alternatively select Open in and select File Browser and use this to save to a student or teacher folder to our network). A video of the book will be saved to the camera roll through the Save Video option. This video can then be removed using File Browser or connect the iPad to a Mac computer and remove it directly onto that computer (any audio and video embedded in the book will be preserved).
  • Export as PDF then Open in then File Browser. Exporting as PDF will lose any audio or video embedded in the book. A great option if you want a hard copy of the final product.
  • Airdrop can be used to export the book as a video, PDF or ePub file to any other Apple device that supports Airdrop.
  • If you wish to save the book as an ePub file onto a computer so that it can be transferred to another device select the share button in the app and choose Export as ePub then Open in then File Browser. This ePub file will be saved but not viewable on a Windows PC. The file can then be put onto any other device that has iBooks.

I have included a video of the comic book I created.

Any subject can use this app to allow students to demonstrate their learning. It produces great digital evidence (no storing paper in a tray or cabinet) for teachers to use at a later date when making judgements about student learning.

If you are interested in learning more about Book Creator and have a device that has iBooks (iPad, iPhone, MacBook) you can get the “Book Creator Teacher Guide” for free (log into the iBooks store with your Apple iTunes id).

cover225x225 Book-Creator-Teacher-Guide-choose-your-subject
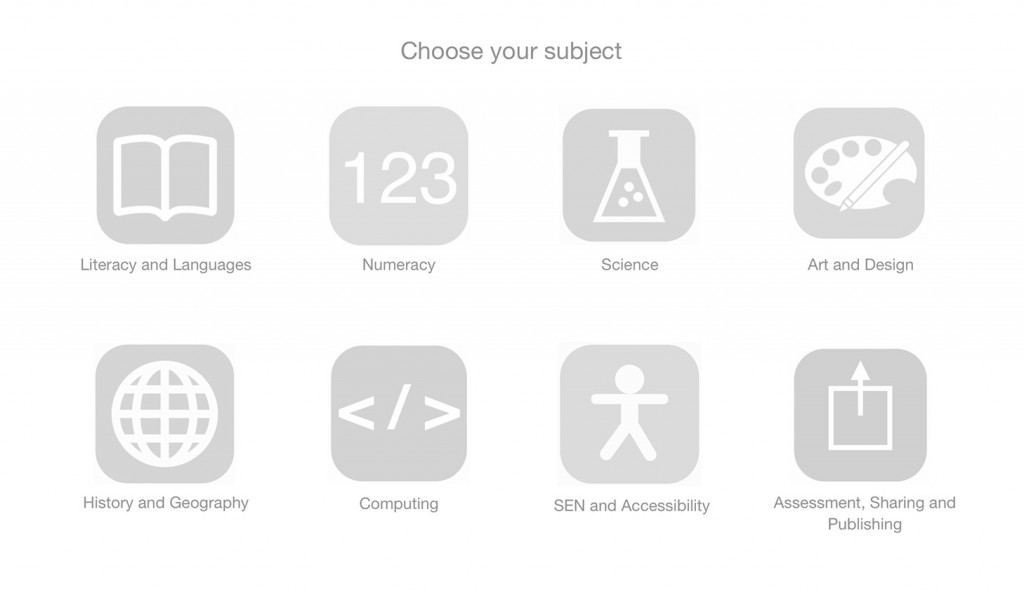
The guide provides a wide range of ways to use the app and can be accessed by subject area from the contents page. Just because your subject area does not appear on the above page don’t be put off by this, any subject can use this app.

The teacher guide will help you with creating:

  • Illustrated audio books
  • Instructional writing
  • Illustrated and audio poetry
  • eBooks in different languages – the language setting can be changed to Spanish so students will be writing and reading in Spanish!!
  • Contents, reference and bibliography pages with links
  • Character motives and opinions
  • Interactive eBook to teach languages or nouns
  • A phonics resources
  • Comic books
  • Newspaper pages and video reports
  • Interactive stories
  • A random story generator
  • Numeracy vocab books
  • Problem-solving processes
  • Science investigations
  • Interactive science books
  • A book to capture the different stages of a technology project
  • Artwork portfolio
  • Interactive maps
  • Compare then and now
  • Biographical books
  • Chronological timelines
  • A record of progress when creating programs or an instruction book for programming (using apps like Hopscotch)

Here are some other links to ways in which teachers have used Book Creator in their classrooms.

  1. 2nd Graders use Book Creator to share their family history with grandparents
  2. Maths – combining the Geoboard app with Book Creator
  3. Publish a photography book while this post is not about students publishing their work the idea of keeping a digital portfolio in a practical subject like photography is a good one.
  4. Writing up a science experiment with Book Creator


PBAS iPads updated and ready to go

ipad-air-hero-xl-2013-1024x541

Over the holidays, the operating system on the iPads and apps were updated. If you are keen to use the iPads and are wanting to know what is currently available on them then refer to the list of apps further down this post (click on the links to read more about what each app does).

I have also purchased four iPad tripod mounts to use in PE lessons with the school tripods. If anyone else wants to borrow one let me know. Useful for recording oral presentations, performances or a practical demonstration.

Example – display a science experiment up on the whiteboard via the Apple TV using a tripod and iPad (camera app) rather than have the whole class crowding around to see. Record the demo for any absent students to use in a future lesson.

Ask yourself if you can use the iPads to enhance your teaching by doing things that were not previously possible before the iPad (or so difficult and time consuming you never attempted them). How can you use them in addition to your traditional content and teaching methods, giving students another way to access the content and present their learning?

As well as the list of apps below here is a link to a range of examples showing how the iPads can be be used in the classroom:

iPad ideas for the classroom – PBAS R-12 Curriculum and Pedagogy.

Also see how Tanya used the iPads in her math and science lessons by clicking here.

Workflow

Creativity – presentation of content, arts, photography, video, music

Document Creation

QR Codes

Programming/Digital Technologies

Spanish

Science

Geography

History

HPE

Whiteboard apps/recording audio and text-based presentations

Problem Solving

Maths

English

I have also included two questions from last years iPad survey around how often the iPads are accessed and teacher beliefs about the iPads as a resource for student learning.

Thank you to the 9 teachers who responded.

Screen Shot 2016-01-05 at 11.54.28 AM


Screen Shot 2016-01-05 at 11.58.33 AM

Formative Assessment using BaM Video Delay app in PE

mza_8734548647415280545.175x175-75

BaM Video Delay is an app that records video and then delays that video for a specified time allowing the athlete to look up after their performance and watch themselves performing a skill or movement sequence.

screen480x480-1


screen480x480

There is no need to press record or play back the video. The app continuously replays what is happening in front of the camera on a delay (set by the student or teacher). The app allows you to delay the video being shown so that the student can complete the skill and have time to view their performance. Students then use this feedback to adjust their performance.

The examples in this post are receptions students practicing their overarm throwing technique and year 9/10 students practicing a forehand topspin drive in table tennis.

Below is the process I used for the Receptions and the Year 9/10 students. Part of both processes was to ensure students knew what they are looking for so corrections can be made.

Receptions (overhand throw)

  • Discussion about the importance of the opposite foot stepping forward when throwing.
  • Discussion about what opposite meant and how this related to our hands and feet.
  • I gave a demonstration which was recorded. We played it back on the big screen discussing if I had used my opposite foot and how did we know.
  • The class watched each other perform the skill and then turned to view the big screen and decide if the student had used their opposite foot. Ideally this would be done in smaller groups but as we were learning how the app worked we did it as a class.
  • The Receptions were only looking at one thing: Was the opposite foot used? This was easily visible from watching it live. However the chance to re-watch it and confirm their decision was useful. The app becomes more powerful the more areas of focus you have. If the Receptions had to make multiple decisions, for example, look for the use of opposite foot, standing side on and pointing in the direction of the target after the throw then the delayed video becomes more valuable.
  • While throwing in front of the camera was voluntary no one opted out. In fact, they were pushing each other out of the way to see themselves on the big screen.

Year 9/10 (table tennis – topspin forehand)

  • We viewed a video of a correctly performed topspin forehand. Four major points were taken from the video and written on the white board for students to have as a reference point.
  • The video was viewed twice and the four points discussed before students had a go.
  • Students then watched their performance, had a discussion with me and then had a go at using that feedback to improve.
  • While not all students improved in the limited time available a couple of students surprised themselves with a dramatic improvement in the amount of topspin and power they achieved using this process.

The app allows for a single screen or 4 screens. the receptions used a single screen as they didn’t require multiple views to make their decision. The Year 9/10 students used 4 screens, each delayed slightly more than the other (7 second intervals) allowing each shot to be viewed 4 times one after the other.

This is the first time I have used BaM Video Delay. The app has great potential to be used on a regular basis in physical education classes as a formative assessment tool.

Technology, PE and Assessment for Learning

Dylan Wiliam presents 5 Key Strategies as part of Assessment for Learning.

  1. Clarifying, sharing and understanding learning intentions & success criteria.
  2. Eliciting evidence of learners’ achievements.
  3. Providing feedback that moves the learning forward.
  4. Activating students as instructional resources for one and other.
  5. Activating students as owners of their own learning.

These key strategies underpin a wide range of techniques that can be explored in Dylan Wiliam’s book, Embedded Formative Assessment.

For the past 2 years I have continued to develop and trial the use of technology in my PE classes. During term 1 this year I tried to incorporate the use of iPads and an app called Easytag to create an process that allowed Assessment for Learning to occur.

During my 7/8 volleyball and 9/10 badminton classes in term 1 this year I decided to use the iPad app Easytag to allow students to record data relating to their performance. The app allowed the class to record statistics relating to student performance. My 7/8 volleyball class collected data on successful digs, sets, serves and unsuccessful shots with the purpose of creating ratios of successful to unsuccessful shots. This occurred at various points throughout the unit to analyse if performance was improving and in what area. My 9/10 badminton class recorded where their badminton shuttle was landing in their opponents court during a game (front L/R, middle L/R and rear L/R). The purpose was to improve the spread of shots played i.e. not hitting all shots into the mid court. Both groups had to use this data to try and demonstrate improvement over the course of the unit.

9/10 Badminton – The Easytag panel was used by a partner to record a students shuttle placement during a competitive game. The example below is one of four panels recorded during the unit. This data was transferred to a proforma in the student’s PE book allowing for easy comparison. The data shows the student was able to improve their spread of shots to the front and rear of the court during the course of the unit.

Note: The data from the Easytag panels and student proforma below are not from the same student.

Panel (ignore the numbers in the far right column)

Seb set 1

Data from the Easytag app was collated on a single sheet. The aim was for students to improve the spread of shots, not having all shots in one area of the court.

Tiana badminton7/8 Volleyball – Students created panels in the Easytag app that displayed the information seen below on the recording proforma. Data was transferred from the app to this proforma so students could see improvement (or not) over time. The student below could see significant improvement from a ratio of approximately 1 successful to 1 unsuccessful shot at the beginning of the unit to a ratio of 4 successful shots to every unsuccessful shot near the end of the unit.

Cooper Volleyball


How has this use of technology helped me to address Dylan Wiliam’s Assessment for Learning Strategies?

Strategy – Eliciting evidence of learners’ achievement

The data was accessible to me on student iPads or in their HPE books for me to view. This information gave me starting points to have discussions with students about what could occur next at a lesson by lesson level. The data provided me with evidence of student learning at three different points during the term.

Reflection – I would have students complete at least one more set of data (most collected 3 data sets) to provide a more constant flow of evidence giving me a better picture of student learning and progress.

Strategy – Provide feedback that moves learning forward

The data was taken at varying points during the unit. The first set of data was taken at the beginning of the unit giving students a starting point to improve on. The second set of data gave students a further reference point indicating if they were heading in the right direction. Explicit teaching, lesson by lesson feedback about how to improve, student commitment and collaboration with peers was required to enable students to successfully use the data.

Reflection – As I have already mentioned I would try to include at least one more set of data during the unit. This would allow students (and me) to access more feedback about their progress at more regular intervals.

Strategy – Helps activate students as instructional resources for one and other

Students showed the data to their partner at the end of each game and quickly discussed strengths and weaknesses. There is no way that I could have assisted all students to collate and receive this amount of data over the course of the unit. Students became resources for each other providing data to move learning forward.

Reflection – I would strengthen these discussions. I did not monitor them closely and suspect that these were not as effective as they could have been. In the future I would include a more formal process of analysis to help students focus on the data more effectively.

Strategy – Activate students as owners of their own learning

Students had concrete data to work with. They could see areas of weakness i.e. I have no successful serves (7/8 volleyball) or I have not been able to hit any shots into the rear court (9/10 badminton). Students were encouraged to use this information to focus on how they could improve (own the learning).  It was entirely up to them to demonstrate through the data their learning over the course of the unit.

Reflection – While students were required to take ultimate responsibility to use the data to try and improve I needed to get around to students more regularly and have conversations about their data to help them direct there own learning.

QUESTION NUMBER 1 – How do you address the following key strategies of assessment for learning?

  1. Clarifying, sharing and understanding learning intentions & success criteria.
  2. Eliciting evidence of learners’ achievements.
  3. Providing feedback that moves the learning forward.
  4. Activating students as instructional resources for one and other.
  5. Activating students as owners of their own learning.

QUESTION NUMBER 2 – What techniques do you have at your disposal to address the 5 key strategies of Assessment for Learning?

1. Click HERE to read more about Assessment for Learning and access a range of techniques to help improve your ability to formatively assess your students.

Live Heart Rate Data

I have just purchased a set of 10 Polar H7 heart rate sensors to use with my PE students. These heart rate sensors bluetooth to the Polar Team app on my iPad which I project onto a big screen via an Apple TV. Everyone can then see what is happening to each students heart rate as they participate in the lesson. The display shows the name of the student, their heart rate and also the percentage of the students maximum heart rate they are working at (maximum heart rate is found by subtracting your age from 220).

Check out the video below showing the heart rate sensors in action. I have also included some screen shots of data captured by the Polar Team app. This data provides a great source of information for students to analyse.

Individual detailed results including the percentage of time spent in each training zone.

IMG_4070 IMG_4071

I am looking forward to using the app to help my year 11 and 12 students develop their knowledge of acute responses to exercise and how the energy systems interplay with each other during a sporting activity. If anyone else at PBAS is keen to use them just ask. A great way to get students interested in their hearts and whats happening when they exercise while generating “real” data for a maths lesson.

Book Creator – A great app for presenting student learning

If someone asked me to list my top five apps to use in the classroom I would definitely include Book Creator. It is one of the most versatile and easy to apply apps for learning. An app that allows student to create interactive multi media books, journals, stories, instructional books for any subject or topic, research assignments, photo books, individual learning portfolios and document whole class learning (Jackie’s hatching chickens program for example). The list is limited only to your imagination.

Click here to select from 65 videos showing how educators have used Book Creator in the classroom to assist student learning. The Book Creator team have compiled these videos from around the world to promote the Book Creator app on their You Tube Channel (two of my videos are in the list – exciting for me anyway).

I have selected two videos to post here to give you a taste of what can be found in the Playlist compiled by the Book Creator team.

Year 7/8 Promotional Videos for Health

The students brief was to select a health based organisation, visit its website, research that organisation (core values, purpose, service to community, research etc) and then plan how they could portray that organisation in a short 1 minute iMovie Trailer.

Organisations included the Cancer Council, Heart Foundation, Beyond Blue, Sun Smart, Foundation for Alcohol Research and Education (FARE) among others.

Students used the following planning tool (the example pictured is the first page only). To access downloadable PDF versions of all the planning tools for iMovie trailers go to the blog Learning in Hand by Tony Vincent. Students can even type into these documents.

Screen Shot 2014-12-02 at 2.39.58 pm

My students had to work in pairs to achieve this task and provide me with a completed planning document before they could move on and create their trailer. Students had to demonstrate the following before creating their trailer:

  • A clear message was required that represented the organisation they had chosen. It had to be simple and easy to understand.
  • The images needed to be high quality. We discussed how to use the Search Filter in Google images to search by Large Image for better quality pictures.
  • Images need to match the text and support the message being conveyed by the students.
  • Spelling and grammar needed to be correct.

One of the major aims of the videos was to promote the health organisation to the community. To complete this aim the videos will be playing in the community library to promote those organisations to a wider audience.

I have included two student Trailers and was impressed by the efforts of all my students to meet the criteria for this task.

iPads as learning journals

During our week 8 term 3 student free day we discussed ways in which to collect and store evidence of student learning. One of these was the idea of using the iPad as a Learning Journal in particular for practical subjects. PE, Food Tech, Art, Science and Technology are all areas that could benefit from this type of learning journal. This is not to say other areas would not benefit but practical areas lend themselves to recording evidence of learning through photos and video.

The example below is a learning journal for Year 9/10 PE (Volleyball). A simple explanation of this journal is that it provides task outlines, success criteria , images and video that support those criteria and spaces for students to insert video and text explaining their learning. I have also created one for my 7/8 Badminton class.

Of course there are hurdles to over come to make this work.

  • Students need access to the same iPad, not every lesson but on a regular basis during the term.
  • The teacher has to create the learning journal in Book Creator and Airdrop (or FileBrowser) it to Book Creator on all student iPads .
  • Students need time in lessons to complete journal work (hwk not possible using school iPad).
  • Students need the opportunity to back up their journal on a regular basis to their student folder using File Browser incase their book is erased (accidentally or intentionally).
  • Students will need assistance and scaffolding to help them use apps like Book Creator and iMovie as well as any other app that might be used to create content for the journal i.e. Popplet and Explain Everything.

Once students have completed their journal the easiest way to hand it up is to Airdrop it to the teachers iPad (teacher opens in iBooks). This could potentially cause another issue as so many journals containing video will require a certain number of Gigabytes of free space on the teachers iPad. However if this is not a problem then the teacher now has access to all the students journals in their iBooks app.

Note: Students should also upload a copy of the ePub file to their student folder using the File Browser app. This allows the book to be deleted from the student and teacher iPads in the future while still providing access to it if needed i.e. a parent teacher interview.

It will be interesting to see how this process works. It is the first time I have tried it on a large scale (46 students across two classes).

Update November 2014 – A completed student journal

Photo Mapo

Photo Mapo is a great app that allows you to incorporate images with a map which shows the part of the world the image was from. The app also allows you to include some text describing the image and or location. There are a wide range of styles/formats to choose from and the app is free. The app allows you to save the image to the iPads camera roll, from here it can be removed easily from the iPad.

Applications for learning and teaching

1. School projects – history/geography. Use Photo Mapo to match an image (man made or natural landmark) with its global position.

2. School camps/sports events – use an image from a school camp in Photo Mapo. A great way to make a newsletter article stand out or add to a report.

3. Students could use an image of themselves (or family members) to show where they live. Students could compare where relatives live around the state, Australia or overseas in relation to other students in the class.

4. Students could prepare a Photo Mapo showing something they did in the holidays and where that was.

5. Use Photo Mapo to design the cover for a book or major project.

6. Art/Science/Maths – find images of famous artists/scientists/mathematicians that are relevant to the content students are learning, include some descriptive text and show where they were born or lived. Print in colour as A3 or A4 posters.

This app enables students to create professional looking images and connects photos with geographical locations allowing for, among other things, discussion around local, state, national and international geography.

Note: Photo Mapo is on the school iPads and the Learn Link internet connection allowed the location function to work when I tested it.

Taking the kids on the Pichi Richi Railway in the school holidays.

Year 5/6/7 Aquatics Camp

Longest river in the world is called River Nile and it stretches up to 6,650 Kilometers or 4135 Miles.

The Empire State Building is a 103-story skyscraper located in Midtown Manhattan, New York City, at the intersection of Fifth Avenue and West 34th Street.